
Sidebar
wlbrdkmtk
Introduction
The following are instructions for building an RDKv4 hybrid image for the DTVKit White Label Box using the Mediatek MT5221 chipset The release is based on RDK-V 2022Q1. Access is needed to the Mediatek git repositories to download the Mediatek specific recipes and software.
Note: git-lfs needs to be installed before the Mediatek repos are cloned. See: https://docs.github.com/en/repositories/working-with-files/managing-large-files/installing-git-large-file-storage
Setup
The build is based on RDK Yocto 3.1 (dunfell) so Ubuntu 18.04 LTS is recommended as the build environment. Follow the instructions provided by Mediatek for cloning their code and recipes into a separate directory (referred to as <mtk_dir> below), but the following steps should work:
- cd <mtk_dir>
- repo init -u https://git01.mediatek.com/dtv/mediatek/manifest -b stbrdkm-rel-rdk-i_poc_rdk_c2s
- repo sync -c -j `nproc` --no-clone-bundle
- repo forall -c 'if [ -e .gitattributes ];then git lfs pull;fi'
When the above has completed, create a directory where the RDK recipes will be cloned and RDK will be built (referred to as <rdk_dir> below).
- cd <rdk_dir>
- repo init -u https://code.rdkcentral.com/r/manifests -m rdkv-nosrc.xml -b rdkv-2022q1-dunfell
- repo sync --no-clone-bundle
- Copy the meta layer directories from <mtk_dir> into <rdk_dir>
- git clone git@github.com:DTVKit/meta-dtvkit-mtk.git
- cd meta-dtvkit-mtk
- git checkout mtk_20220715
- cd ..
Building
- source meta-dtvkit-mtk/setup-environment
- Select “meta-dtvkit-mtk/conf/machine/dtvkit-whitelabel-dtv.conf”, option #37
- bitbake lib32-rdk-generic-hybrid-dtv-image
Flashing
When the build has completed successfully, a set of scripts and binary files for installing from USB can be found in a directory called “Target” in “<rdk_dir>/build-dtvkit-whitelabel-dtv/tmp/deploy/images/dtvkit-whitelabel-dtv/MTKIMG/usb_update”. The whole “Target” directory needs to be copied to a FAT, FAT32 or vfat formatted USB memory stick that has at least 1GB of free space. Copy the “Target” directory to this device such that “Target” is in the top-level directory. The device must also be writeable when the image is installed.
Now proceed with the following steps:
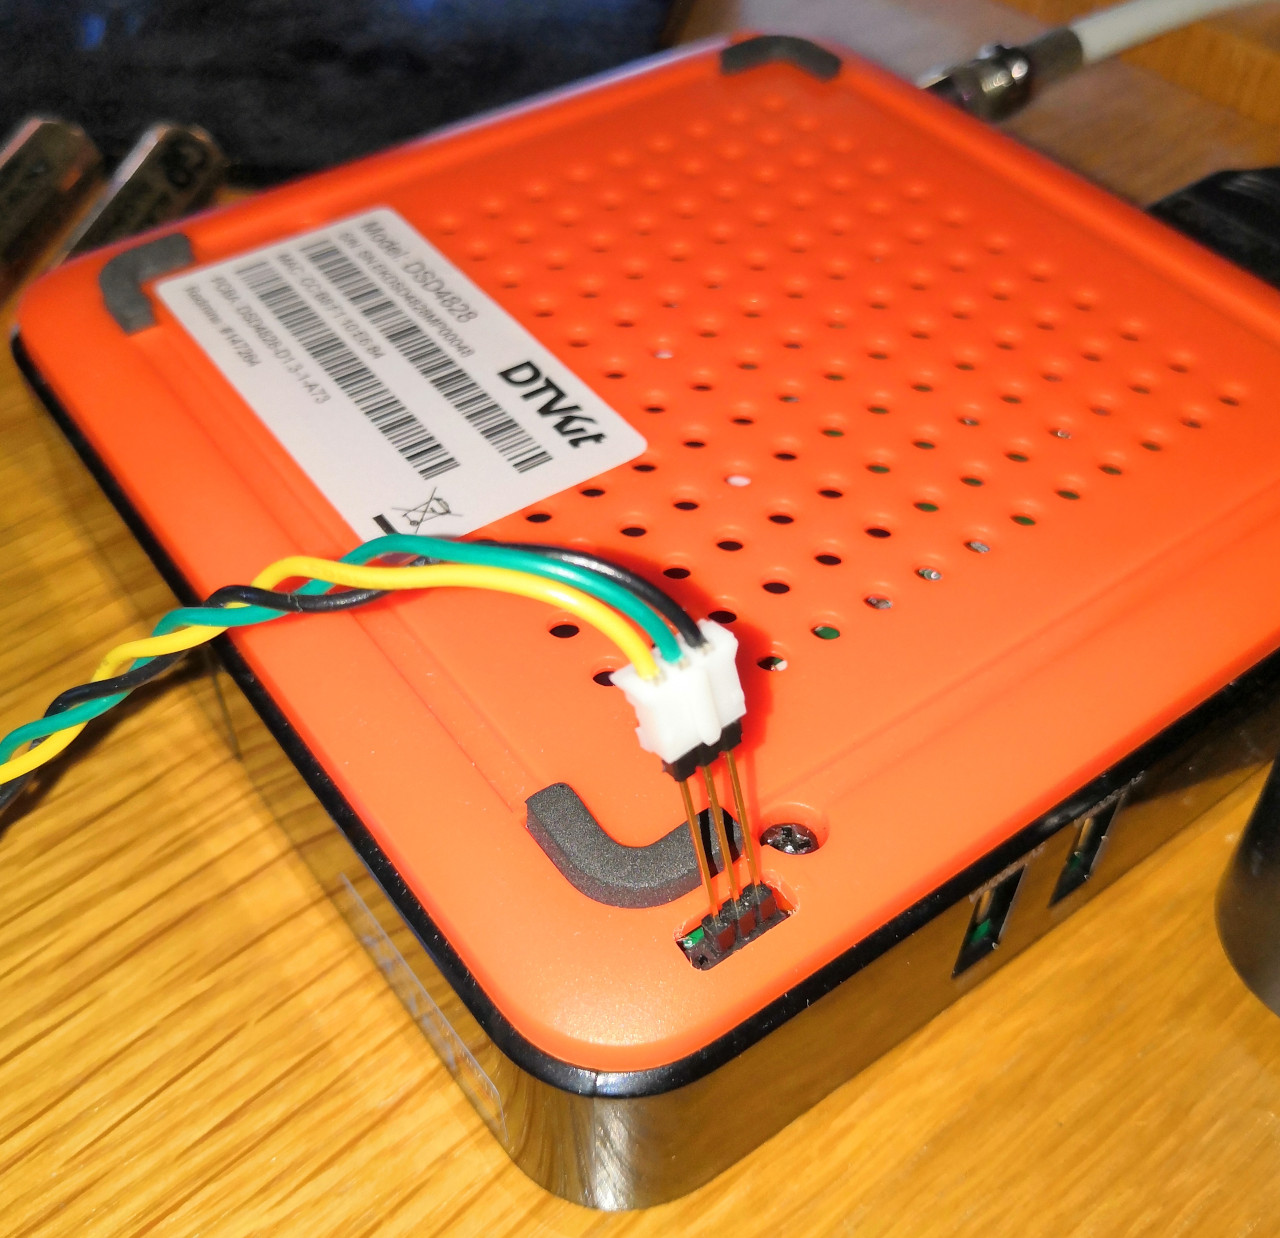
- Connect the serial adapter to the STB as shown here:
- Use a serial communication program to connect to the serial and use the following settings: 115200 bps, 8 data bits, 1 stop bit, no parity, no hardware flow control.
- Power on the STB and within the first 3 seconds press any key (e.g. spacebar) to interrupt the boot process. You should now be at the a command prompt showing: “MT5221#”
- Insert the USB stick into either of the 2 USB ports on the side of the STB.
- If the USB stick is inserted into the USB towards the front of the STB, enter usb start 2 at the command prompt.
- If the USB stick is inserted into the USB towards the rear of the STB, enter usb start 0 at the command prompt.
- Completion of either of the above commands should result in “1 Storage Device(s) found” being shown on the console.
- To start the update, enter udstar at the command prompt.
- The update will take less than 2 minutes after which the box will boot into the newly installed image.
wlbrdkmtk.txt · Last modified: 2022/08/22 13:01 by steve
Except where otherwise noted, content on this wiki is licensed under the following license: CC Attribution-Share Alike 4.0 International
